Monday, March 18, 2013

Graphic 45 Design Team 

2013 Audition

It has been a dream of mine to be on the DT of Graphic 45 for over a year now.  I use almost only Graphic 45 papers in my projects because I feel inspired by their collections.  Their quality is outstanding and the colors and patterns are really fun to create with.

As part of my audition I'm submitting some of my favorite projects that I've made over the last year.  Some were pinned on Pinterest by Graphic 45.  If they were good enough to get pinned by Graphic 45 then they must be in my audition.  I have so many projects that I wanted to submit but finally narrowed it down to just these.

The first project is this card I made early last year.  I had just gotten my first shipment of Graphic 45 papers and I was so excited to play with these wonderful papers.  I began using zippers in my projects when two good friends gave me a bag full of them.  I love being able to zip it closed or open, it is just fun.  This card I used Steampunk Debutante and added a simple tag in the front.  It makes for additional journal space.  I make my own flowers when I have the time... and this card was lucky enough to get one.


This next little project was my first altered box.  I never want to toss even the smallest piece of Graphic 45, so this was a great way to use the small scraps.  I  sew on a lot of my projects, and I have sewing notions everywhere.  I used bobbins for the feet of this box.  I love reusing items that aren't being used into something fun and useful.


I love finding items at the thrift store.  Things that someone no longer wants and turning them into something original and special. I found this great cabinet and added some Ladies Diary papers to it.  I has two mini albums one in the bottom drawer and one sitting on the shelf.  I love all the little drawers that you can put keepsakes in.  


This card was one of my first ray cards.  I saw a layout that someone posted with sun rays going off behind the photo.  I decided that would be a  great way to use scraps and decided that it would even look better if I stitched the rays down plus I'd save on adhesives.  


Here is an altered canvas I did.  My first one.  I combined Olde Curiosity Shoppe papers and Steampunk Debutante, two of my favorite collections.  The butterflies are my favorite, they are great to fussy cut and add to all my projects.


Here is another recent project.  I used another thrift store find to make this album for my daughter.  I often see those old-fashioned black paper albums like the ones my grandmother used to add photos to.  This one was in excellent condition except for a not so pretty cover.  I altered it with my daughter's favorite Graphic 45 papers and gave it a theme of Paris since she is so in love with it.  I used some of Graphic 45 Staples which my daughter drools over when in my scrapbook room.  I must admit that I'm selfish with the sharing of my Staples....they are just so beautiful.  This was an excellent gift for my daughter's 11th Birthday.


Here is one of my latest cards using ABC Primer and Kraft Reflections papers.  I used paint to distress my edges.  I love to fussy cut images, use sewing notions like the metal zipper, add jewelry and of course the Staples.  I wish I could use more than one per project but with the amounts of projects I try to complete each week and with limited resources this is just the best I can do.  Here is to hoping I make the Design Team and can really go all out on a project.  My husband says that if I make it I can quit my job and scrap full-time which is also a big dream of mine.


 Well I can't believe that I didn't even include a project from Secret Garden or French Country.  Perhaps if I get to the second round I can show those collections off a bit.  It was really hard to choose.  I hope you enjoy these projects and a little flash back over my last year.


Saturday, March 9, 2013

Secret Garden Card

I had a nice relaxing day of scrapbooking this wonderful Saturday. 

I decided to do a tutorial based off of the ABC Primer Card I recently made.  Hope this gives you an idea of my process for making this type of card.  It really is simple, you just have to be willing to cut and use your Graphic 45 paper.  Once you are able to do that this card comes together super easily.  I used Secret Garden Collection for this tutorial.


Here is what I used:

Recollections Kraft Corrigated Cards
12x12 Sheet of Sun Kissed
2 images from the 8x8 Springtime
3 images from the 12x12 Seed Fairy
1 image from the 8x8 May Flowers
2 images from the Secret Garden Stickers
4 inches of flat back pearl ribbon
1 cupcake size doily by Wilton
As desired Folk Art Acrylic white paint


Here is the cards I use. I almost always have my cards open from the side.  They stand up better this way.


I painted all the edges of the papers I wanted to use. You can use a paint brush if you feel more comfortable but I use just my finger tip.


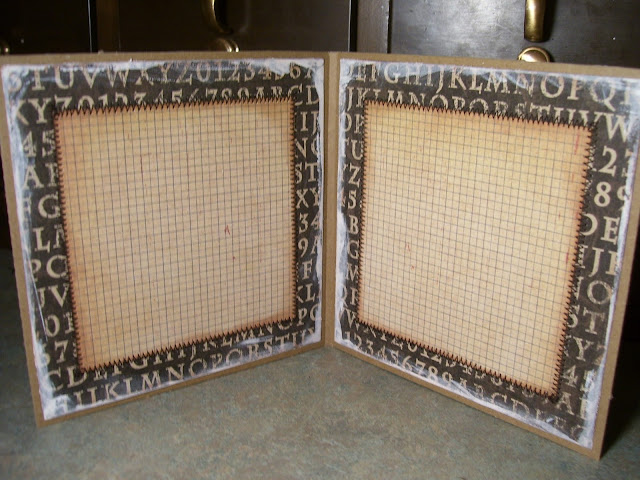
I stitched the front and back papers to the card and stitched the off white 4x4 sheets of paper (from the back of your Secret Garden stack) to the inside papers.


I then use Zots and Mounting Squares to attach the inside pages to the Kraft base.


I then Glossy Accent the seed packets to the inside corners.


Then I begin to decorate the front (This photo is of the back before I signed it)  It is important to sign your work.  My husband says, "Would you rather have a card made by Tim Holtz, or have a card made and signed by Tim Holtz?"  When he puts it that way I see his point. 


I start by gluing the doily to the top corner, you can do this in any way you want.  The doily only peeks out the back to give dimension to the project.


I added a few layers making sure to spread them out.  It makes your card look fuller.


Next add the tag to the side.  Put your quote or saying top center by using pop dots or thickers.  I knew it needed something else.  My 11 year old daughter suggested bling, and of course she is right.  I dug through my stash of trims and found these stringed half back pearls.  They were perfect for the soft bling I was going for.


 The key to a great card is layers and textures:  Corrugated cards, great quality papers, distress (paint), overlapping and dimensionals (foam squares), and just a little bling to finish it off.


Thursday, March 7, 2013

My Journey of Distress With Paint


Welcome to Sew Scrappin blog today.  I was very much inspired by my recent Valentines Tag that I made for Graphic 45's Valentines February Challenge.  I have had so much fun using paint instead of Vintage Distress by Ranger, my go to all for distressing my work.  I got the idea from Tara Orr one of the designers over on Graphic 45.  She made a Layout or something and used paint, and I just loved it and wanted to give it a try myself.  Scrap-lifting is the biggest form of flattery right?  Here is the Tag I made back in February.


I used mostly Scraps of On The Boardwalk, Olde Curiosity Shoppe, Kraft Reflections, and Place In Time.  This tag really doesn't have a back or front as I like both sides and couldn't decide which I liked best.

Then came another tag I made while watching Downton Abbey.  It was funny that someone said that it reminded them of the show.  All by accident I assure you.  I just craft while I watch my shows or listen to music and what comes out just happens.  I always start with the paper collection and what it will be (card, book, altered object, etc.) and then let inspiration flow from there, I usually don't have a plan when I sit down to create.


And Now this brings me to yesterday I got in a shipment of Graphic 45.  It was a box full of Graphic 45 ABC Primer and Kraft Reflections two really great lines that are being discontinued.  I wanted to stock up the store before it was all gone.  

Here is what I did.


I started with four sheets of paper.  Grammar School and School Days of ABC Primer and Express Yourself and Bed of Roses of Kraft Reflections.  I also used one chipboard element from the Tags #2. I used one large Metal Tag from the Staples Collection.  I used eyelets, small cupcake size Wilton doily, two jewelry pieces purchased at Michael's, part of a metal zipper from (Leslie and Niki my scrap buddies in Bend, Ore.)and FolkArt white acrylic paint. 


I used almost a whole sheet of the Express Yourself paper for the background of the front, back, and inside of the card.  I fussy cut out some images from the Bed of Roses sheet and used Tim Holtz distress inks fired brick and peeled paint to watercolor the flowers.  I cut out two of the tags from School Days sheet and added the eyelets and zipper.  I laid out all the items the way I wanted and glued down all the big parts.  I then decided I wanted to add paint so then began finger painting the paint in all the areas I wanted adding paint to the metal tag and other embellishments.  Once the paint was all added I finished attaching everything with Glossy Accents by Ranger.  I finished it off with the chipboard girl which is my favorite part of the card.


The tiny little metal jewelry piece above the girl says inspire.  

I also decorated the inside and back to make sure that the card was pretty throughout.


I hope that you enjoyed this tutorial today.  I've been really enjoying myself.  Now that this blog post is done, I'll be back at it. Thanks so much.  More photos of my work can be found on Pinterest and Sew Scrappin Facebook Page.  Thanks. Amy

Sunday, March 3, 2013

I'm so excited for the upcoming month of crafting I'll be doing.  I'm going to audition for Graphic 45's 2013 Design Team.  Who doesn't want to be a part of such a great company.  I use their papers all the time anyway.  

Here is a simple project that I did today.  


New French CountryGraphic 45


Here is what I used.  

Recollections paper pad for the backgrounds.  I really like the colors in this collection they go with everything.  

Then I used parts of 3 sheets of the new French Country Collection by Graphic 45; Bon Appetit, Sunflower, and Abunance.  

My Ranger Tim Holtz Vintage Photo Distress Ink.  

1 Small Doily by Wilton.  

May Arts ribbon 382-34-10 (Chevron, white and black)

I used my sewing machine with brown thread.  Glossy Accents by Ranger.  Therm-o-web mounting squares and zots.


Here are some additional pictures of the card.  I think it is important to decorate the entire card.  I stitched the Recollections and the distressed Abundance paper down to the card.  I then stitched around the Bonjour tag with a small piece of ribbon wrapped around the bottom.  I then glossy accented the doily to the back and the sunflowers to the front.


I tied a bow with the May Arts ribbon and hot glued it to the front.  I added a Graphic 45 Staple small Metal Tag with a sticker from the French Country sticker sheet.  I used Glossy Accents to attach it to the front.


The back is simply the paper stitched to the craft card base.  The cards I use are Recollections Kraft Corrugated Cards that I purchase at Michael's.  They have wonderful craft envelopes that I love.


The inside has more Recollections paper.  The off-white sheet that came in the back of my French Country 12x12 Stack I cut into 4x4 sections.  I use this paper for nice writing space inside the cards.  I did a lot of fussy cutting of the sunflowers for the inside.  I attached them with Glossy Accents.


I hope you like my card today.  This is just to show you that you don't have to break the bank on making pretty cards.  Combining your favorite collections is a great way to use less of those pretty papers you are hoarding.....we all do this.