Another Day Here At Sew Scrappin
I'm so sorry I've been too busy to post anything new. I've been busy doing the mom thing, working my "other" job, while trying to complete some fun new scrappy things. I've been trying to keep up with cards for my Ebay store and make a few necklaces for my Etsy store. So things have been busy for me, and just don't look like they are slowing down.
Graphic 45 Tropical Travelogue
Those that know me, know that I am always on Graphic 45's Facebook Page and their blog. I won a stack of Tropical Travelogue and some chipboard and stamps. I have a customer who buys my cards on Ebay who told me she just loves Ladies Diary cards and Tropical Travelogue. So this week I made several Ladies Diary cards, and since I had time today, I thought I'd make a Tropical Travelogue one. Hope she likes it.
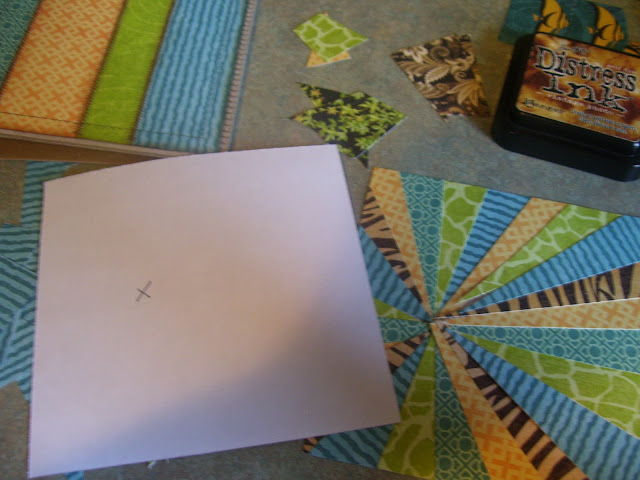
I start with 5.25 x 5.25 sheet of thin (icky) paper and add some photo squares to two sides. I then start inking strips (left over from other projects) this one is from On The Boardwalk Collection. It goes really well with the colors in Tropical Travelogue.
Here is the ink I love to use Vintage Photo Distress Ink by Ranger and Tim Holtz.
Here is all the strips laid out over the paper. I don't care that they are different sizes. They will all look great when I'm done.
Here is what the square looks like after all the paper is added and all the sides are inked.
I then stitch the paper to the card base. In this case I use a corrugated pre-made card base with matching craft envelope. I zig-zag stitched the scraps together before attaching it to the base. For this part no adhesive is needed. I save a lot of adhesive sewing my projects. Thread is so cheap but beautiful.
I put the card aside and begin making the front. I use the same size thin paper for making the front. I use other scraps in triangles to make my rays. I have a tutorial on Youtube if you want to know how I make them. I'm much better at them now.
I stitch the rays down with my Brother sewing machine. I zig-zag some, and straight stitch the rest, just for fun.
Here is what it looks like when it is all finished and the strings are all snipped with my scissors. (sorry the picture is a bit blurry)
I start laying out embellishments that I like to see how I want them placed. I then attach them with Glossy Accents by Ranger.....My favorite go to for glue. I love how fast it dries, I'm always in a hurry.
I use some button flowers from SASSAFRAS they were a gift from someone for hosting a swap. I'm much better at putting names on things that people send me, so that I can give credit, but sometimes or if it was awhile ago I don't know who gave them to me.
I use the Alpha Sheet to put Thank You down the side of the card. Graphic 45 is doing a Contest for November for Thank You Cards. Go check it out on their Facebook page. Of course I'm trying to win more products so I had to add this sentiment.
Here is the paper I choose for the inside of the card. I'm using the back sheet of the stack.
Here are some close ups of the card.
Here is the back of the card.
The front of the card with the envelope. I'm in love with these card bases and envelopes. I get them at Micheal's in case anyone wants to know where I get them.
Here are more photos of the front.
Here is the finished inside of the card.
I really love how this turned out. I want to THANK YOU for stopping by my blog today and taking time to see me in the creative process. -Idaho Amy


