Tuesday, July 31, 2012

Ladies Diary


Over the last few days I've been working on another of my Graphic 45 Ladies Diary sets.  I'll be listing it later today on my Ebay page.  


I used my rays, zippers, and grunge flowers on this project.


The box is covered in the beautiful polka dots and closed in ribbon.  Here is a close up of the card.


I just love everything about this paper collection.


 Flowers from Leah I've used them so much.  I just love them.


I hand dyed the pink ribbon using Tsukineko Cherry Blossom Walnut Ink Antiquing Solution.  I then added some bling from Leah and Debi and chipboard.

Here is the first two pages.


I added a zipper to the first page that zips open and closed.  I think it is important to make your album interactive and make it last so I always sew my zippers (no glue, ewww.  


On the 2nd page there is a mini book closed with lace.  Chipboard and pearls finish it off.


Here is pages 3 & 4.


I had some fun fussy cutting the flowers and clocks.  My tip:  ink the edges takes away the white look of the edges that you might have.

Here are pages 5 & 6.


I made a waterfall card inspired page.  Each of the layers lifts up for room for photos or journaling.  


I cut the girl and added her to this page like she is walking through a door and the paper behind her is perhaps wall paper in the "other" room.  Under the bling down the side is a pocket with note cards and journaling spots and other photos can be added.


This is what the back looks like.  Just love this paper.

Thank you for stopping by my blog and taking a look at my latest project.  

Monday, July 23, 2012

Graphic 45 On The Boardwalk


Here is a box set I made using On The Boardwalk.  I tried to do a step by step tutorial but got so involved in my work I forgot to keep taking pictures as I went.


I covered the outside and inside edges with My new Ranger Dabber.  I love these.  They work great makes for fast work and I don't have to clean a brush when I'm done.


I cut one of my favorite sheets of the line to fit the top of the box.


I then added the boarder of that same paper around the edge of the box.  I take the closure off while painting and once I have the paper on I add it back on the box.


I picked a pretty blue color for the bottom strip.


I even added paper to the bottom, can't leave it brown and boring, love this paper too.


I was going to type this is one of my favorite papers in the line but really I just love them all.  This is the top of the box.  I added paper to the sides too.


More beautiful papers line the inside of the box.


I added a Prima Flower I picked up in Portland, One of my handmade grunge flowers, and the pretty white one was sent to me by Leah who sent me some really cool vintage stuff.  This is where I got so excited about the project that I forgot to take pictures, but I took a bunch at the end.


Better view of the whole box.


Here is a better view of the whole inside.


Here is the front of the mini.  I really love this for the front.  I added another one of my handmade flowers and a pretty Prima flower.


The charm was made by Raquel last summer when we did a dangle swap.  She even added the lady picture in it from this collection.  It was perfect for this project.  Everyone loves the little bottle of sand with the pearl and shell.


The Mermaid tag on the left was made by Debi.  I've been saving it for something special and this was it.  I clipped it on with a binder clip and once you remove it there is lots of room for a photo.  The right side was too pretty to cover up.


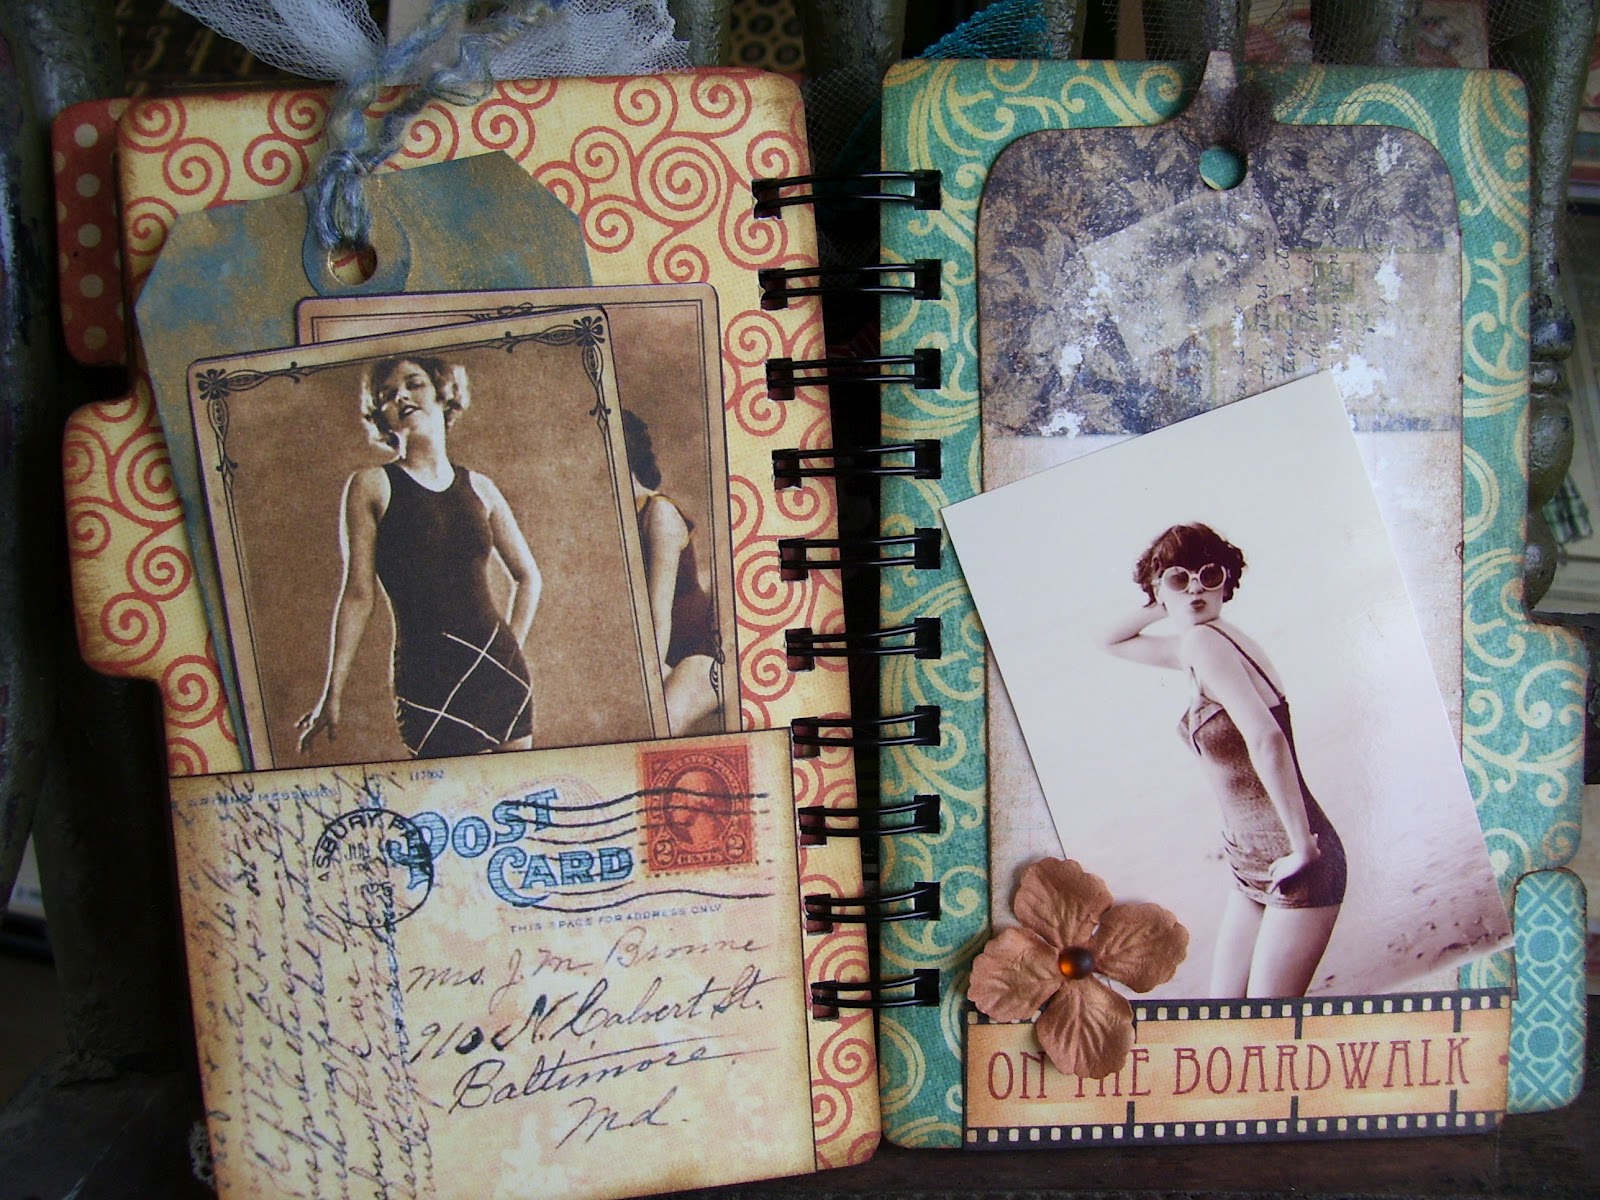
These two pages are pockets.  The left side has some photo ephemera and a tag made by Diane Seacrest she even put real sand along the bottom of it.  Really beautiful you'll have to see my Youtube video to appreciate it.  On the left is a tag made by Raquel and a photo I found on the net.  Just love that sassy young lady and her sunglasses.


Gotta love these gentlemen in their swim suits.  I couldn't cover them up either.  On the right there is a pocket and I added this photo that can come and go if it wants to.  Just love those stripes she's rockin'.  Thanks Leah for those cool embellishments  (The circle with the head) I've used those like crazy on most of my projects the last week.


Here is the back of the mini.  I love it.


The mini fits perfectly in the box, but who would want to hide it in there?


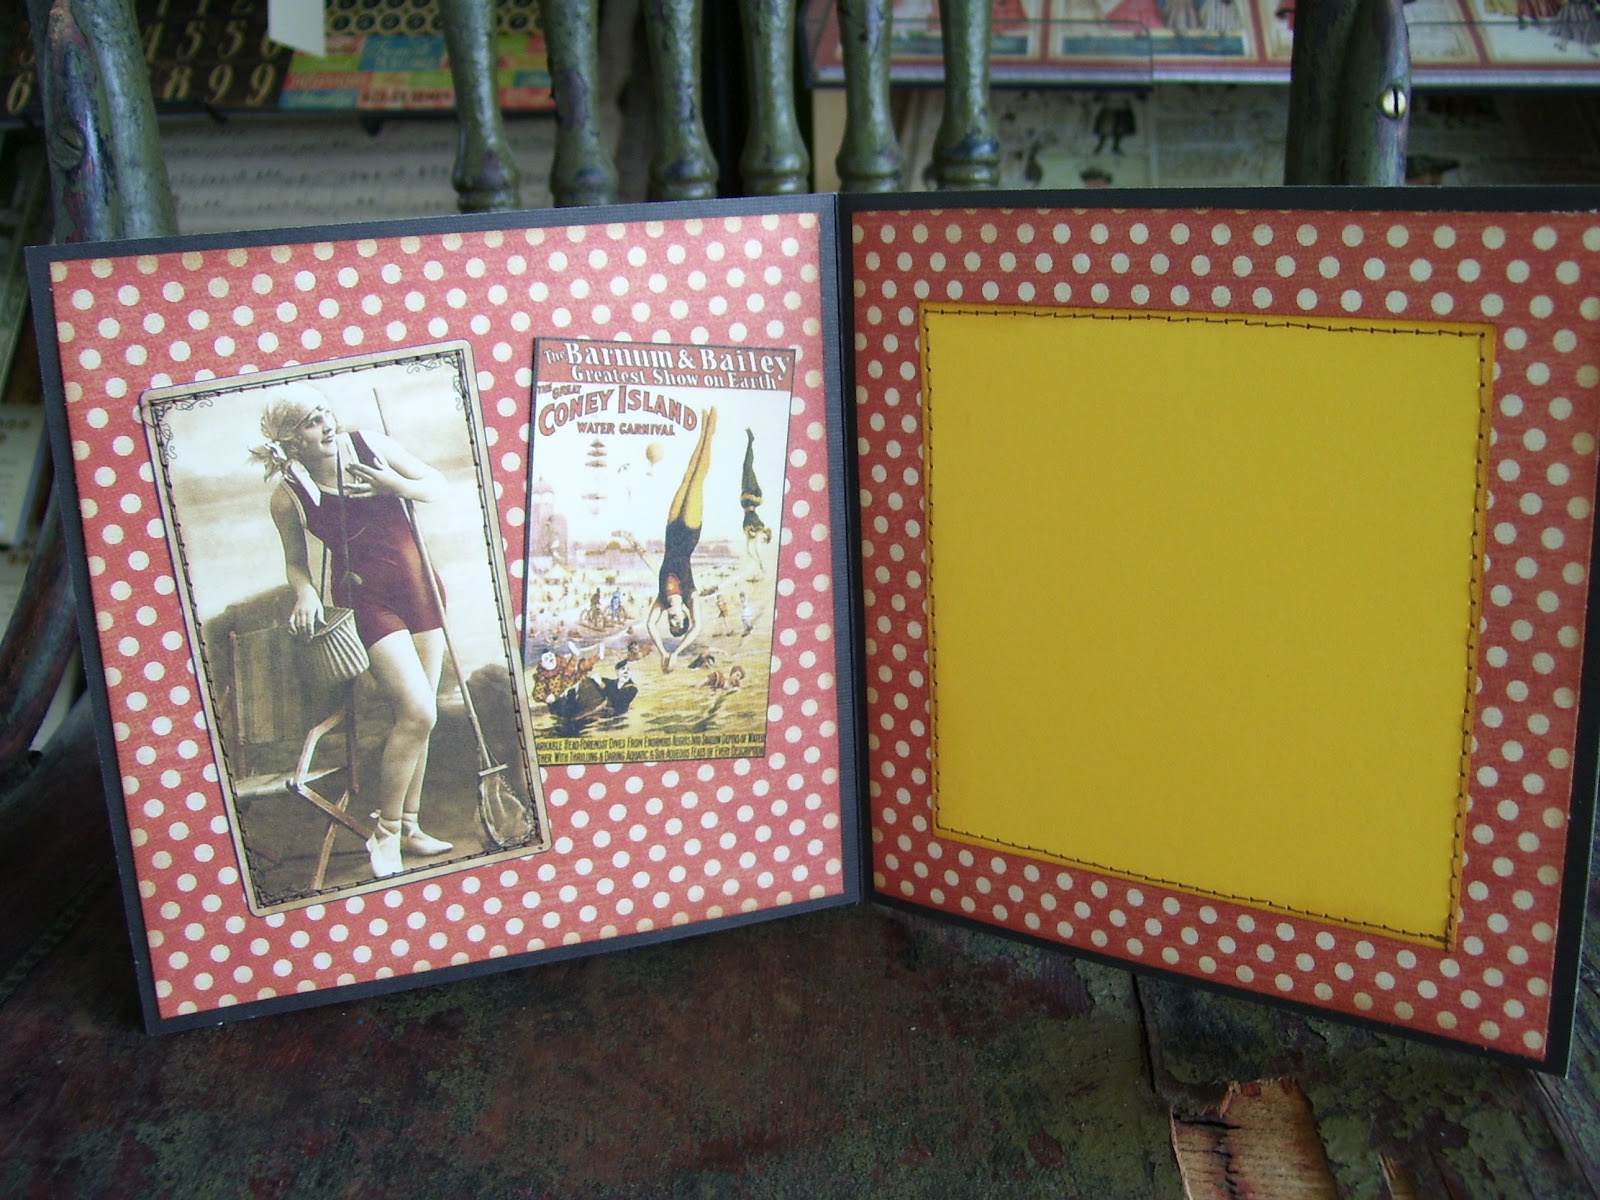
Here is a card I made using scraps.  None of my Graphic paper goes to waste.  I use it all.  Even the small bits get punched into a circle and then stitched together for garland for my store Christmas tree.  The photo was found on the net and goes really well with this stack.


Here is the inside of that card.  Really love these images.


Here is another card.  All three cards will go with the mini and the box.


Lots of room in this card for messages or photos.


Here is the last card.  I picked this photo right off and knew this was going to be the front of my card.


Here is the inside.


 I'll finish with two photos of the whole set again.  I love this set way more than I ever thought I would.  In flat 12x12 Sheets the paper is pretty, but when turned into something like this I GET IT!!!

Sunday, July 22, 2012

Today was productive.  
I made two simple layouts using Graphic 45.


This one is using Tropical Travelogue papers.  This one has two frames from the collection and I just stitched them to the background paper.


I trimmed down this pattern paper so that it was approx the same size as the opening.  I then tore all the edges off and inked them.  I then randomly tore sections out to reveal more of the pretty peach paper.


I inked a doily and then added a 4x6 photo frame.


Added another photo mat (approx 3x4 or wallet size)


I added two pcs of chipboard using glossy accents, my favorite way to glue things.  I then added the circle image and the tags to fill it in more.


Finally I added a few fussy cut flowers from one of the pattern papers and the layout is now complete.


This Layout I made using Once Upon a Springtime.  My idea for this layout is to make it similar to the last one and save time. I started with a sheet of paper for the background and then added one of the frames from the collection.


I then trimmed and tore the paper as before.  I also inked the edges.


I added another doily and photo frames for photos.


Here I added some hand made grunge flowers and a couple of butterflies that I got from Leah.  Now there are big blanks to fill.


I tuck some images from the collection into the sides of the photo mats.  This way they can be removed if needed and journaliing or additional photos can be added to the backs of the images.  I still don't feel like it is really complete. I want to add some bling somewhere but it is complete enough for now.

Late Last week I completed a mini Album set using Tropical Travelogue.  


Here is the front of the Album.  I added a dangle that Debi made in a swap we did last summer.  I made the girl and bushes 3-D.  I really love how it turned out.


Here is the next two pages.  The lady on the left pulls out and opens and has room for additional photos or journaling.  You can also add a photo behind her on the page.  The right side opens up when you untie the lace.


The left side is a pocket with some tags and room for photos.  The right side is also a pocket with the leaves and you can tuck things or additional photos in there as well.


More photo mats and tags on the left and on the right.


Here is the card that went with this set.  I really love the photo of the lady.


Here is the tag that I made to match.  The charm was made by Diane Seacrest.  It looks so beautiful on this.


Here is the whole set together.  I hope the person who buys it really enjoys it.  I really love these papers.

Thanks for stopping by and checking out a few of my crafts this week.  Come back next week when I hope to finally have that hat box completed using Ladies Diary.